
One of the most common ways customers look to extend collaboration platforms is the ability to create custom dashboards. In most cases, these platforms enable this requirement through a modular framework, typically referred to as Widgets, Gadgets, Tiles or in some cases Snippets. Just like there is variability in naming these conventions, there are equal differences on how each of these features are designed and implemented. For today’s post, I’ll cover the in’s and out’s of extending Igloo Dashboards with custom HTML and Integration Widgets. So buckle up, grab the popcorn and get ready to learn more than you wanted to know about Igloo Widget development.
Getting Started
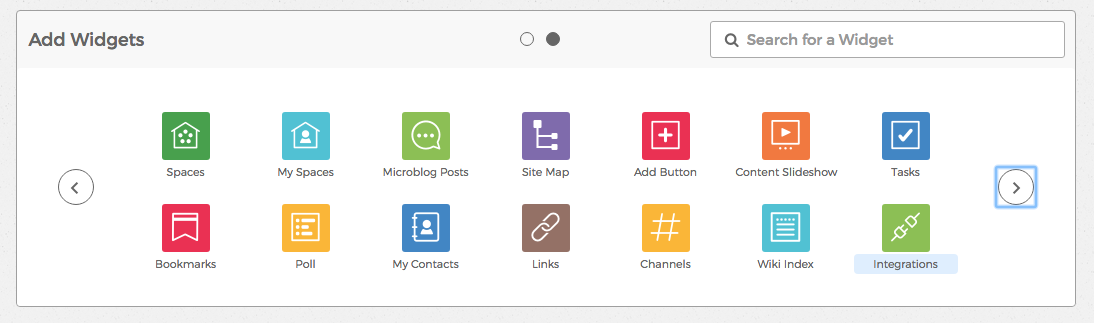
The first thing to understand about Igloo Widgets is that there are technically two types of Custom Widgets you can create using Igloo. Both flavors come with their Pro’s and Con’s, so let’s talk about those really quick.
HTML Widgets
 HTML Widgets are one-off widgets you can create using a generic HTML Content Widget that allows you to paste in HTML on the configuration to be displayed in a generic wrapper. These are great for ad-hoc embedded resources and snippets you obtain from other platforms; however, their biggest draw back is that customization to the widget requires editing the source-code directly. Most end-users would prefer to avoid this experience at the fear they would mess something up, and there is also risk (if used in multiple locations) that instances may become out of sync making the solution difficult to manage at scale given there are no tools to manage the deployment and configuration of these HTML Content Widgets across the instance.
HTML Content Widgets let you embed references to external Javascript and CSS resources, or you can define them inline, with minimal interference from the system stripping out reserved characters.
In addition to being simple to get started and deploy, it’s important to note that HTML Widgets also have equal access to Igloo’s API, which can be used to create some solid dynamic experiences. This makes them a great test bed for proving out capabilities.
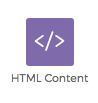
To get started with the HTML Content Widget, simply edit an Igloo Dashboard Page, and search the widget repository for HTML Content (see: glyph above)
Integration Widgets
 Integration Widgets are very similar to HTML Widgets; however, they have a lot more structure, which depending on your needs, can be both a good and/or bad thing.
Here are the key differences:
- Integration Widgets must be deployed to an Azure Storage instance that requires a one-time setup by submitting a ticket to Igloo Developer Support to internally setup and link with your Igloo instance(s).
- All assets (JS/CSS/HTML/images) for your custom widget should be stored in Azure Storage (unless you want to reference them remotely).
- At minimum, you will need to store:
- The Integration Widget thumbnails (thumbnail.png & thumbnail2x.png)
- The main Integration Widget HTML file (content.html)
- The integration.json metadata file for your Integration Widget
- You can do this using an Igloo developed Node.js library called ig-deploy, or manually drag and drop files in if you are so inclined with the Azure Storage Explorer (albeit this does require zipping a JSON file everytime you make a change).
- At minimum, you will need to store:
- Integration Widgets allow for developers to customize a configuration screen to capture simple string, numbers and boolean values from the end-user, and those values are made available via the Javascript run-time (window.frameElement.getWidgetConfig()) at render time; however, you have no access to the configuration experience itself as this is rendered for you using your configuration.
-
Unlike HTML Content Widgets, Integration Widgets are loaded via an IFRAME on that same-domain as your Igloo instance rather than inline in the page DOM.
- The most valuable features an integration widget offers is the fact that it is a named element that can be discovered in the Integrations Widget menu by the end-user, and it is single sourced for every use in a given Igloo instance.
- As of August 2018, you will need to deploy your Integration Widget to each Igloo instance individually for customers to use it, but this is only necessary one-time.
To get started with the Integration Widget, see the following Igloo documentation to set up your development credentials:
- Getting Started with Integration Widgets
- Integration Widget Example
- Creating Custom Configurations for Integration Widgets
HTML vs. Integration Widgets
I’m a strong believer that there is always a right time and situation for every technology. The trick is making sure you properly understand the time and situation so you can make the best technology decision possible.
Here are some quick thoughts you should consider before deciding how to build your first custom Igloo Widget:
| HTML Widget | Integration Widget |
|---|---|
|
|
Understanding Widget Context
Sometimes a widget doesn’t require any level of context. It can just blindly render some code irrespective of who or where it is being viewed; however, the most powerful widgets tend to have a strong affinity to context making them relevant and valuable. One of the things you may have noticed about the Igloo UI, as it relates to Widgets, is that it is very friendly for helping a developer understand the context of what is going on. All widgets are loaded inline into the DOM (meaning you have clear access to read/manipulate it), and nearly everything meaningful DOM element has an Object UUID associated with it, which means that if you know the right API to call, you can usually hydrate that UUID into something more useful.
Here are some common places you can look to best understand context:
-
Current User - Unfortunately, there is no ideal way to glean a fool-proof context for a user from the Igloo runtime. There is a JS variable you can inspect, Igloo.currentUser which will return an JSON object with id, href and name for the current logged in user. However, since this object can easily be updated by an external user via the browser’s developer console, it is not recommended that you use this value to do any level of enterprise identity linking. It is recommended that your widget own the linking process in it’s UI … and then drop a cookie or additional marker as necessary to securely identify users.
-
Current Place - The easiest way to establish where a Widget is loading is to look to the DOM. If you do a jQuery search, such as below you can get the Object UUID for the Page/Space to call the API to get more details. See (Accessing the Igloo API from Your Widget) below.
jQuery('h1 span.eip').attr('id')
Accessing the Igloo API from Your Widget
Depending on your custom widget use-case, you may or may not need to access the Igloo API, but if you need to do it, here are a few pointers you should consider.
- Igloo’s API is comprised of a V1 and V2 API with different payload response formats. Both of them require an iglooauth cookie to be set with an Igloo issued auth token to function. (See: example below)
- When executing a GET, you can pass the Accepts: application/json header to receive the results in JSON.
- Practically all end-points in V1 and V2 are interacted with via x-www-form-urlencoded to POST information, even if you receive in JSON, values like Body content will still be XML encoded. So you will need to be mindful of how you decode and re-encode these values when shuttling data between API calls.
- While the document shows using direct JS xhr manipulation, you can use standard jQuery ajax() calls, such as the following:
jQuery.get(`/.api/api.svc/objects/${objectUUID}`,
  function(res) {
  }
);
jQuery.post(`/.api/api.svc/....`,{ hello: "world" },
  function(res) {
  }
);
Here are some common API service that will get you started on your first widget:
GET /.api2/api/v1/community/info
- Retrieves the current community and gives you the Community Key parameter required in many calls.
GET /.api/api.svc/objects/${OBJECT_UUID}/children
- Retrieves the children of a given object.  If this object is a Space/Page, it will return Channels.  If it's a channel, it will return content in most cases.
GET /.api/api.svc/objects/bypath?path=${URL_ENCODED_IGLOO PATH}
GET /.api/api.svc/objects/${OBJECT_UUID}
- Retrieves the object reference for a given URL, similar results to the OBJECT_UUID variant listed below. (For example: /blog1 or 59aa26c2-1231-4a2c-9bb4-b0615be573a0 respectively)
Developing My First Igloo Widget
As part of this blog post, let’s take a quick look through the first widget I created on the Igloo platform, and how I broke it down.
Use Case: Easily see my current following status for all channels for a given Page/Space, and toggle them in an easy and meaningful way.
Before you get started, you should always take note of where you are going and what you need to get there. This is a walk through of the exercise I did for this Widget. Note: Since I wanted to get up and running quickly, I started out using an HTML Widget knowing that I can easily convert it to an Integration Widget after-the-fact.
- Understand Required Inputs and Where You’ll Get the Data
- Current Place UUID - (Page DOM: see above)
- Current Place Sub-Channels (API: /.api/api.svc/objects/${OBJECT_UUID}/children, see above)
- Channel Name (data: channel.title)
- Displayed as the <A> Title on Mouse-Over (or additional animations as desired)
- Channel Type (Forum, Wiki, etc…) (data: channel.__type)
- Channel UUID (data: channel.id)
- Channel Following Status for Current User (data: channel.statistics.subscribed)
- Channel Name (data: channel.title)
- Alter/Change Channel Following Status (API: /.api/api.svc/account/subscriptions/(delete|add) )
- Create the Basic UI using the API Data
- Grab OBJECT_ID from DOM
- Call Object Children and Render UI from Results
- Register On-Click Method for Each Button
- Toggle the Following State as needed
- Iterate / Test / Package / Deploy
- Since I was using an HTML Widget, my package and deploy were one in the same. I declared all resources in-line or referenced via external CDN hosts. To deploy, I simply edited the dashboard and corresponding Widget and copy/pasted it.
Here is the screenshot of the finished widget after following this exercise:

Tips to Streamlining Development
From my personal experience, developer platforms are made or broken by their developer experience. Sometimes the platform is dialed in at 11, and things are sweet, and sometimes not so much. For Igloo, there is definitely some work to be done to make their platform more developer friendly; however, I know that they are hard at work taking feedback from their customers and partners to make improvements. That being said, it’s not the end of the world for Igloo Widget Development. In doing some research and a little bit of innovation, I was able to prove out a few paradigms that might help you build Igloo Widgets with greater ease.
Local Node.js SFTP Pass-Through to Azure Storage
This solution was pretty slick and fun to build because it was a throw back to old-school FTP. In short, I leveraged a common file remote sync solution for my IDE as my front-end. I configured it to sync changes from my local project (for specific folders) to an SFTP server running on my local machine. Every time a save in the IDE was issued to my widget files, the file would be uploaded to my local SFTP server, where I would turn around and upload it to my Azure Storage instance in the right place.
| Pro | Con |
|---|---|
|
|
Local Node.js HTTP Proxy Service (Favorite)
This solution was pretty slick, and it’s what I use as my go-to environment for Igloo Widget development. Basically, I created a local HTTP service and configured it with proxy paths to forward specific resources to the actual Igloo server, allowing them to be served up locally on my HTTP instance. This allowed me to recreate UI styles, and a rough Javascript run-time environment for the Widget to run in. It supports API proxying as well, so I could test API calls locally, which was a god-send. I seeded the Igloo.currentUser and Igloo.widgetConfig objects from a configuration that I can manually set/toggle at startup so I can test all configuration permutations, and I have templates for small, medium, and large column widgets to test look and feel.
To setup, I simply npm install a module to my project and edit the configuration file accordingly. To iterate, I simply need to save and refresh the browser window. When I’m ready to deploy to Azure Instance, I can use the standard ig-deploy tool to push the changes.
| Pro | Con |
|---|---|
|
|
Hopefully some of these ideas spur similar innovation on your end to work the way you want to work.
Closing Thoughts
In short, Igloo Widget Development can be quite easy given the way the platform is designed. There are a lot of quick wins that can be made with very little effort which is great for the end-user efficiently getting the experiences they want for their digital workplace. When it comes to developing enterprise grade integrations, you will most definitely require some form of middleware and authentication model that can layer atop Igloo (and/or leverage frameworks provided by other solutions) to properly secure the identity context, but that isn’t the end of the world given that Igloo has plenty of off-the-shelf integrations for the usual enterprise suspects.
I hope these ramblings about my first experiences with Igloo Widget development have been helpful. If you would like to reach out to ask questions and/or contract Paladin to design some Custom Integration Widgets for your Igloo instance, just let me know.
You can connect with me on the Igloo Developer Community, use the Discus comments below or drop me an email.
Until next time. #KeepOnCoding!